Spaying Your Cat 101: 9 Frequently Asked Questions

spaying your cat

If you’re looking into the process of spaying your cat, there are sure to be plenty of questions swirling around in your head. Don’t fret! We’ve got you covered.

For many, the who, what, where, when, and why can overtake you. Some might wonder what spaying is or how it’s different from neutering. Others might be curious about where the procedure should be done. Or, when is the most appropriate timing? Why is spaying important?

To help put your mind at ease through this whole process, we’re answering some of the most frequently asked cat spaying questions.

Here are the nine most frequently asked questions about our little buddies with nine lives:

What Does “Spay/Neuter” Mean?

The spaying process refers to sterilization (removing the reproductive organs), specifically for female cats. This procedure disrupts cats’ ability to go into heat and reproduce. A male cat, in contrast, would be neutered, which means the cat’s testicles are removed under anesthetic.

Depending on where you are in the world, your cat could undergo either an ovariectomy or ovariohysterectomy. An ovariectomy is when a vet removes just the cat’s ovaries; it is most common in European veterinarian practices. On the other hand, an ovariohysterectomy is when you remove the cat’s ovaries and uterus. This procedure is most common in the United States and Canada.

When Should Your Cat Be spayed?

When you should spay your cat is completely dependent on her individual circumstances.

For instance, if you are adopting a kitten, it’s recommended that you schedule spaying between six and seven months of age. While it’s possible for cats around four months old to reproduce, it’s not very common. Before this age, your cat will likely be too young to reproduce. While adult cats can (and very often should) be spayed, kittens can have an easier time recuperating.

If you have adopted an older unspayed cat, you can talk with the Certified Pet Lifestyle Experts™ (CPLE) at AskVet for advice on the best surgery time. Every cat is unique in their own special way, and this decision will reflect that.

Older cats might have underlying medical conditions that might make the anesthesia process a bit more serious. Your vet might want to do testing to ensure your cat is healthy for this procedure.

What Are the Benefits of Spaying Your Cat?

It’s no secret that there is a homeless cat population worldwide. Cats can reproduce many litters, but that doesn’t mean they need to! When you decide to get your cat spayed, there are many benefits, and population control is one of the main ones.

When you spay your cat, you are helping reduce cat overpopulation that contributes to unwanted litters and cats living in shelters or on the streets.

Regarding health benefits, spaying your cat can greatly reduce their risk of mammary tumors and uterine cancers (as well as testicular cancer in males). Spaying can prevent uterine infections and even the rupturing of the uterine.

When “queen” cats go through their heat cycle, sometimes as frequently as once a month, they might engage in some unwanted behaviors you’d prefer they didn’t. Some hormone-driven behavioral problems might include aggression, yowling in the middle of the night, and possibly small amounts of urine marking.

What Are the Risks?

With every good thing said about spaying your cat, it’s impossible to ignore discussing the risks it carries. The risks are extremely low and rare when it comes to the spaying of a cat. The main risks involve general anesthesia and internal bleeding due to complications (either during or after the spay surgery).

These aren’t the things that should be at the forefront of your mind. With a trusted veterinarian, you can discuss these fears. They should have a plan to help your cat. When interviewing a new vet, you should always feel positive that they have your cat’s best interests in mind.

What Should Cats Expect from This Surgery?

This shouldn’t be a very long surgical procedure. Like with any medical procedure, understanding the logistics of what will likely happen can help you feel better. Your cat won’t understand, so this is mainly to ease your mind.

Leading up to the surgery, your veterinarian might recommend your cat avoid snacking after midnight the night before the procedure. Then when you bring your cat, she will be put under anesthesia so that she doesn’t feel any of the procedure.

Generally, the vet will make an incision in her abdomen and remove the ovaries and uterus (or just ovaries). Then they will stitch up the incision site and give your cat an “Elizabethan collar” to keep her from biting at the sutures. These stitches should be kept clean and out of reach of your cat’s curious tongue.

After seven to ten days, the vet might choose to remove the stitches during a post-surgery check-up.

How Long Is a Spay Surgery?

Typically, a cat can go home the day of the surgery — perhaps with pain medication and an adorable cone, but home nonetheless! Some cats have a very speedy recovery and soon want to go back to throwing books and vases off countertops.

You should make sure that your cat keeps their play to a minimum and that they avoid messing with their sutures. Cats don’t realize it, but that could cause them a lot of trouble.

What Is the Recovery Process Like?

The recovery timeline can be different for every cat, but the recovery process is often a breeze. Your cat might become playful shortly after or overly curious about her new scar. For this reason, keeping a close eye on her is key. Additionally, a controlled and contained environment and a cone can help protect them from their own mischief.

While your cat is in surgery, you can set up and prepare for the recovery process. Make her bedding nice and comfortable, a freshly cleaned litter box, and food and water (if allowed) that is easily accessible.

When your cat comes home from the surgery, you will want to keep her as calm as possible to not disturb her stitches. You’ll want to keep her bedding and litter box spotless to avoid any possible infection. Your cat might be a bit needier during this time. Good thing we would never turn down some cat cuddles!

How Can You Tell if a Cat Is Already Spayed?

If you adopt a kitten, the cat is likely unspayed since she hasn’t reached the proper age for the procedure. If you have adopted an older cat through a rescue, they probably have done a full check-up with the cat and could let you know what your cat’s medical records say.

Now, if a homeless cat has chosen you by coming to your door and refusing to leave, you might not know their complete history. You can ask to have a veterinarian check out their underbelly to look for a scar. Your cat could also undergo a blood test that can detect if your cat has been spayed or not, called the “Anti-Müllerian Hormone Assay.

How Much Does a Cat Spay Cost?

The cost of getting your cat spayed depends on several variants. Where you get it done, where you live, your cat’s age, and other factors might impact the pricing. You might also take your cat to a low-cost spay facility and sign-up for their services. This is one way to still do your part but for a more affordable price.

In general, a cat spaying can range anywhere from $200-500, but the price can vary.

Spaying in Summary

Spaying pets is a great way to ensure that all cats can go to a kind and loving home. Without the help of humans, kittens are being born daily. Spaying is a safe and common procedure that can protect your cat from unwanted pregnancy and health-related complications.

If you still have more questions, you can download the AskVet 360° Pet Care App. Right now, for only $9.99/month, you can gain access to 24/7 virtual veterinarian care. When you download the app, you also gain access to 1:1 personalized pet care to help your pet live a long and healthy life.

You can ask any question you might have at any point in the day and get a quick and speedy response and receive help with a wide range of animal wellness themes along the way. All pets are welcome, including dogs, lizards, and even fish. Whether your cat is a queen or she just acts like royalty, AskVet is here to help.

Sources:

Ovariectomy or Ovariohysterectomy? | Cornell University Veterinary Specialists

Current Perspectives On The Optimal Age To Spay/Castrate Dogs And Cats | NCBI

Spaying And Neutering | American Veterinary Medical Association

Queen (Cat) – an Overview | ScienceDirect Topics

Feline Reproductive Function Tests | Cornell University College of Veterinary Medicine

Living with an Intact Female Cat | BC SPCA


Reiki for Dogs 101: Fact vs. Fiction

reiki-for-dogs

As pet parents, we would do anything to keep our furry friends happy and healthy. We go the extra mile (or extra thousand miles) to help them when they are in distress. One way to look out for your pet’s well-being is by incorporating Reiki healing into their well-rounded care routine.

Continue reading to learn more about Reiki healing and how it may help soothe your pet.

What Is Reiki Healing?

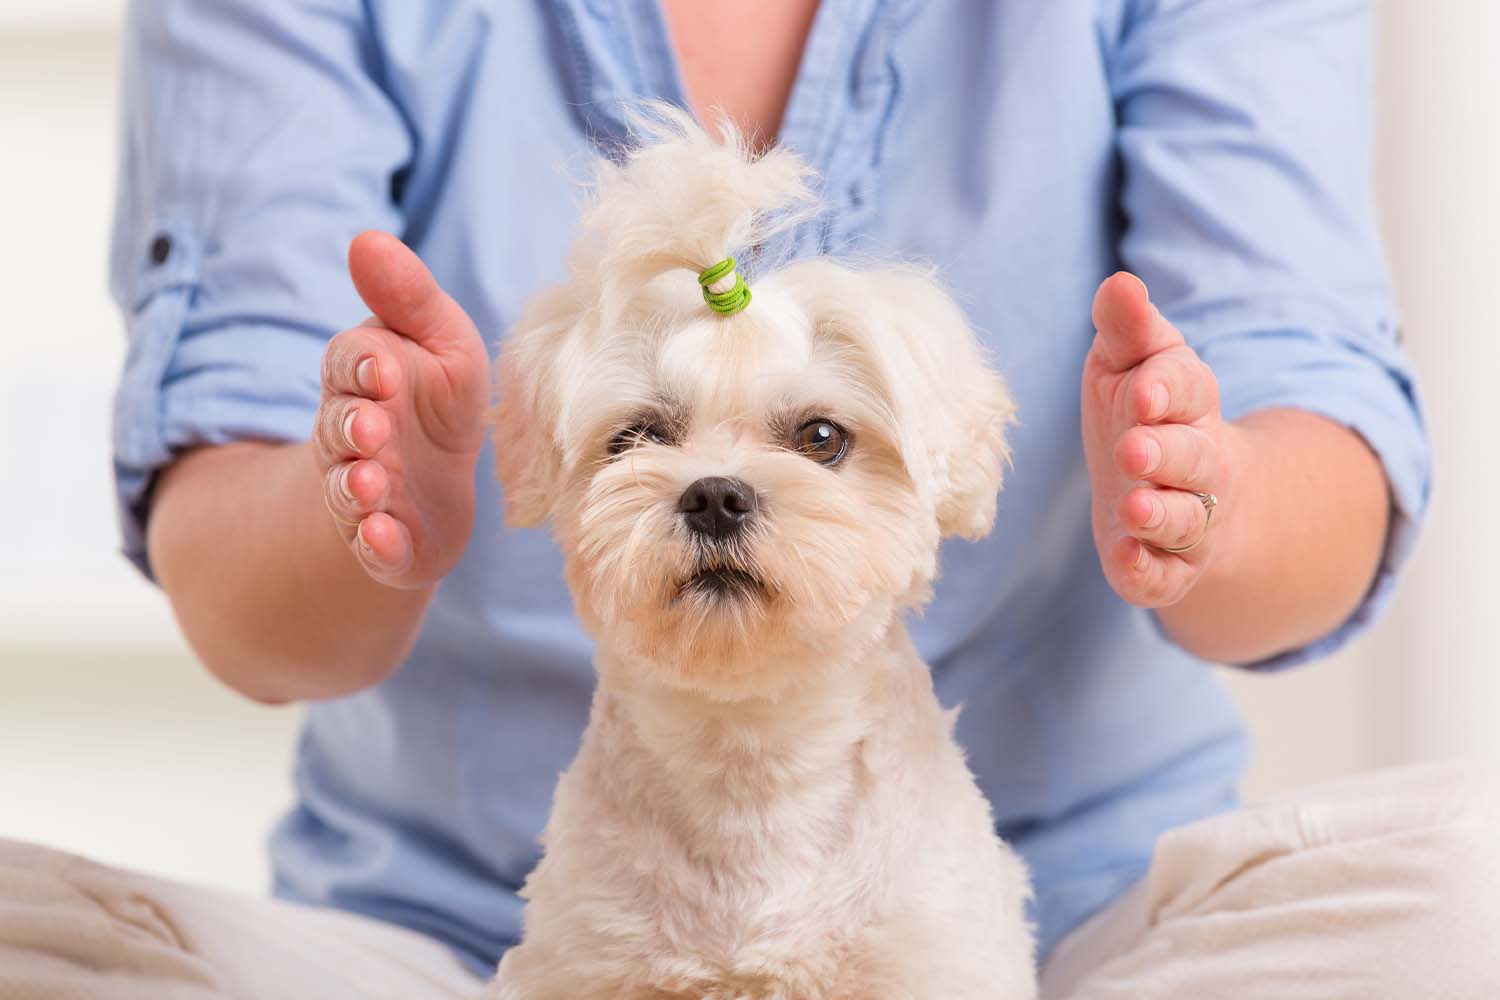
Reiki healing is an ancient form of therapy that can be used to soothe physical, mental, and emotional pain. Reiki practitioners attempt to deliver energy to the body through a technique called palm healing. Palm healing is supposed to balance energy to promote relaxation and reduce some physical and emotional pain.

Some humans swear by Reiki healing, but can it help dogs?

What Are the Potential Benefits of Reiki for Dogs?

Dogs benefit from Reiki in similar ways to humans. It might help dogs adjust to situations that might otherwise be anxiety-inducing (such as going to a new place or meeting new animal friends). It may even assist in recovery after illness, injury, or surgery.

Here are a few ways your dog could benefit:

Stress Relief

One of the main overall benefits of Reiki for anxious animals is that it may relieve stress. Reiki is often associated with warm sensations that participants find particularly soothing.

When a Reiki practitioner creates a calm environment through meditation, then invites the dog to think about joining, the dog could gradually feel more peaceful and less anxious. This practice could be especially helpful for dogs in high-stress environments such as crowded shelters and homes with multiple people or pets.

Medical Care and Recovery

For dogs experiencing illness or recovering after surgery, Reiki may encourage the body to repair itself naturally while easing muscle tension. This practice could help pups decompress before receiving medical care as well.

Trauma and Behavioral Problems

Sometimes, Reiki supports dogs in animal shelters who are struggling with overstimulation, boredom, and unpredictability.

Reiki may help them overcome trauma from their past and resolve behavioral problems, possibly increasing their chances of successfully transitioning into a new home. While Reiki shouldn’t replace traditional behavioral training techniques, it can be a great addition to a trainer’s toolbelt of resources.

Grieving Process

If a dog is grieving a human or pet family member who has passed, Reiki could possibly provide a sense of peace while adjusting to life without their loved one.

End of Life Process

Reiki could help dogs who are about to pass feel tranquil before crossing the rainbow bridge.

Bonding

Reiki can allow you to connect with your dog and spend time with them in a way that benefits both of you. When you share that gentle, compassionate space with them, it might be easier for them to open up to you.

If you have brought home a new dog who is having trouble getting acclimated to an unfamiliar environment, this practice can encourage trust and a sense of belonging. Reiki might provide a healthy space to allow them to feel like themselves again.

How To Perform Reiki for Dogs

Now that you know what Reiki is and how it can help your dog, you might be wondering how to perform it. Let’s discuss some hand positions and give basic instructions so your dog might fully benefit from this practice.

Reiki is non-invasive. It only uses touch to transfer energy from you to your dog, and they do not feel any pain during the process. This makes it easy to perform anywhere, anytime.

Each position should be held for a few minutes to allow them the opportunity to begin to decompress. It is more effective to start at the top of your pup’s body, then move downwards throughout the session.

Hand Positions and Techniques

  • Shoulders: Put your right hand on your dog’s left shoulder and your left hand on the right shoulder. You may need to modify the placement of your hands based on your dog’s position.

For instance, if your dog is on their side, place both hands on the side of their upward-facing side. If they are standing or sitting, place one hand on each of their shoulder blades from behind. This position, like all positions, should be held for several minutes (or as long as your dog is enjoying it).

  • Midsection Area: Center both hands on the middle of your dog’s stomach if they are lying down. If they are standing or sitting, put your hands on both sides of the spine.
  • Chest and Head: Place one hand on your dog’s chest and the other on their head between their ears.
  • Chest and Back: Center one hand between your dog’s shoulder blades and the other on their chest.
  • Lower Back: Put your hands side-by-side on your dog’s lower back, directly above the tail. When your dog is lying on their side, your hands can remain next to one another. For this technique, you should put one hand on each side of the spine when your pup is standing or sitting.

How To Create a Positive Atmosphere

Like in all manners of dog training, positive reinforcement and having a fun time is key.

It is important not to force dogs to participate in Reiki but simply hold space for them and invite them to join. This ensures they won’t feel anxious throughout the session and can take things at their own pace.

Over time, your dog could be more inclined to participate when they see that you continue to hold space in a gentle, supportive manner.

If your pup is asking a little shy, here are some ways to encourage them to get in on the fun:

Continue Holding Space

If your dog is uninterested at the beginning of the first session (or for the first few sessions), remember that it will take time for them to become accustomed to Reiki.

As you continue to create and hold a relaxed space, it will be easier for them to be open to the process. The purpose of Reiki is to transfer your own zen energy to your dog. If your energy is strained, your dog might not be receptive to it. You will see better results when your dog is slowly introduced to Reiki.

Let Your Dog Lead

Don’t try to control the session. Give your dog time to feel comfortable in the space and let them show you what feels right while you observe your pup’s reaction.

When your dog feels like they hold their fate in their own paws, it can help make the overall process go smoothly.

Be Patient

When practicing Reiki with dogs, results are hardly ever immediate. Some dogs may have more difficulty or react differently than others. With patience (or maybe a treat and tummy rub), dogs could be more receptive to Reiki as you continue.

Can Pet Parents Benefit From Giving Reiki?

We’ve talked about how your dog can benefit from this treatment, but what about the pet parent, aka you? You’ll be glad to know that Reiki is mutually beneficial even when it’s focused on your dog’s well-being.

Here are some ways Reiki could help you become a better companion to your best friend:

  • Connection: Reiki creates a steady environment that both you and your dog can share, providing an opportunity for you to connect on a deeper level. You might notice that using Reiki helps you better understand your dog’s behavior and moods.
  • Relaxation: Reiki is meant to relieve any tension or stress your dog may be feeling. By holding this calm space for them, you can start to feel more serene along with them.
  • Easily Accessible: Reiki can be done anywhere and doesn’t require special tools or equipment. Just head to your dog’s favorite space to chill and get ready to unwind.

Help From Animal Reiki Practitioners

If you prefer an Animal Reiki Practitioner to work with your pup, the prices tend to vary based on the number of sessions and the length of each session. Some Animal Reiki Practitioners will perform at-home sessions, which could cost more than regular sessions.

Virtual Reiki sessions are also an option, which some dogs might respond better to (depending on their demeanor and comfort level around strangers in their space). Online courses and tutorials that can help you learn Reiki independently may be less expensive than professional sessions. Plus, you learn a new skill and spend some quality time with your favorite fluffy friend!

Is Reiki Right for My Pet?

Reiki could be combined with traditional veterinary medicine practices as well as other forms of behavioral training, preventative care, and diet and exercise. If you’re unsure about which practices are best suited to your furry friend, you can reach out to AskVet.

AskVet’s Certified Pet Lifestyle Experts™ are here to be the best friend of man’s best friend. They are here to advise loving pet parents on anything and everything. Connect to the AskVet app for just $9.99 a month to put all four paws forward.

Sources:

All About Reiki: How This Type of Energy Healing Works, and Its Health Benefits | Everyday Health

Reiki Healing for Pets: Is It Possible? | American Kennel Club

4 ways that Reiki can help shelter animals | IVC Journal

Pet Dental Health – What Not to Ignore

Dog with toothbrush

Welcome to the AskVet Webinar Series where our doctors and veterinary professionals present relevant information and discuss important pet topics. Join our live streams to learn how you, your dogs, and your cats can live your best lives! 


Dental disease affects a majority of cats and dogs and is the most common course of chronic pain for our pets. Catching dental issues before they become advanced or painful is the goal of this discussion with Dr. Marks. Dental disease typically has an early onset with more than 80% of dogs and greater than 50% of cats over the age of 3 affected! Untreated dental disease can also cause problems in the body making early detection so important. For those pets afflicted by untreated dental disease, the bacteria under the gums circulates in the bloodstream and can affect the heart, liver, and kidneys. Watch below to learn more about dental disease and ways to proactively look for signs and symptoms.

Lesser known signs of dental disease

  • Discolored teeth (This can be caused by plaque and tartar.)
  • Red gums
  • Broken teeth
  • Bleeding from the mouth
  • Bad breath! #1 indicator (The bad breath is caused by a gaseous waste product of bacteria in the mouth.)

3 subtle signs of dental disease in dogs to not ignore

  1. Swelling under eye
    This is caused by a tooth root abscess of the 4th premolar on the upper jaw, otherwise known as the carnassial tooth. It is the largest chewing tooth. This condition is painful and requires oral surgery such as a root canal or tooth extraction, antibiotics and pain meds.

  2. Drooling 
    This indicates pain. Also nasal discharge can occur if there is an oronasal fistula, or a hole from the canine tooth to the nostril.

  3. Dropping food 
    If dropping food is out of character for your pet, you notice chewing on one side only, or your pet is eating slowly when normally they eat fast, then a dental problem needs to be considered.  

3 subtle signs of dental disease in cats to not ignore

Cats are by nature very stoic. They do not show signs of pain as this makes them vulnerable to predators, so it is important to carefully observe your cat for subtle signs of dental disease. 

  1. Red dots 
    These are resorptive lesions typically found on the crown of the tooth, They are hard to see, but indicate disease under the gum. This is usually a genetic issue where the immune system attacks tooth roots and erodes and dissolves tooth’s blood supply causing the tooth to fracture. Extraction of the affected tooth is the treatment of choice.

  2. Pawing at mouth, 
    Cats will normally paw or rub their faces during normal grooming, but if this behavior becomes more aggressive and less gentle, then they may be experiencing oral pain.

  3. Appetite change 
    Most cats have predictable eating behavior. If normal eating behavior changes, if not dental disease causing the problem, it is something else that needs to be investigated.

Best ways to to prevent dental disease

  • Although brushing is best, it is not always possible in reality. Toothbrushing is dependent upon the pet’s temperament, their training, and your ability to commit time to their dental care. 
  • Try to pair your pet’s toothbrushing session with a bedtime routine. 
  • Use finger or baby toothbrushes. 
  • Daily dental care is the key. Do something every day whether it be dental wipes, chews, oral rinses, or prescription food. It makes you flip the lip to look at your pet’s dental health to hopefully catch abnormalities sooner rather than later
  • Go to the Veterinary Oral Health Council to learn more. They also list many approved OTC dental options for your pets. 

At AskVet, we know that every pet has its own personality and unique set of needs, which will continually evolve over time. We’re here to help you evolve with them. We use 360° Wellness Plans to help guide you through every stage of your pet’s life—and we’re with you every step of the way.


Join AskVet Today


Give your pet the personlaized care. Get the app!

Puppy Potty Training Success in 20 Minutes

puppy potty training

Welcome to the Askvet Webinar Series where our doctors and veterinary professionals present relevant information and discuss important pet topics. Join our live streams to learn how you, your dogs, and your cats can live your best lives! 


House training a puppy can be a very frustrating process and can lead to anxiety and even anger, but with patience and a calm presence, can become a very rewarding endeavor. If done correctly, potty training can create a happier dog and a stronger human-animal bond. Join Dr. Marks in our live AskVet webinar to learn how to effectively house train a puppy. 

5 steps to house training a Puppy

  1. Schedule time blocks and a house training routine.
    Before getting a puppy, think proactively about how your life will be affected and if you have time to commit to a puppy. Your work schedule, travel plans, and daily home life for instance will be impacted and must accommodate a puppy that is being house trained. Create a village to help! Have friends, family, co-workers, pet sitters, or neighbors assist with the process.

For puppies, less than 12 weeks of age, they need to be let outside every 1-2 hours during the day. For puppies more than 12 weeks, they need to be let outside every  2-4 hours during the day. Puppies usually need to go immediately after waking, after playing, and after eating or drinking. 


Bring them outside on a leash. This not only helps with potty training, but helps them learn how to walk on a leash and aids in socialization. 


Use a 2 word command every time you take your puppy outside. For instance, if the puppy’s name is Franklin, say “Franklin potty.” Overtime, Franklin will understand this command. 

  1. Create a feeding schedule. Mealtimes and training times need to be connected. Within 20 minutes of eating and drinking, your puppy will need to potty. Feeding at the same time every day will increase predictability and lead to better house training success. 

  1. Use a crate. Dogs in general are den animals. They like to snuggle and bed down in a safe space. A crate creates this safe space for a puppy. Let your puppy eat treats or meals and  have toy time in the crate to make it a positive space. They also will not sleep or eat where they eliminate, so using a crate is a form of natural discouragement from urinating and defecating in the house. Crate size is important as well. Ensure the crate is only big enough for your puppy to stand up, turn around, and lay down. A crate that is too large will allow the puppy to eliminate in the crate while having a separate space to lay down. Crate dividers can be used to expand the crate size to meet the needs of a growing puppy. 

  1. Reward Be your puppy’s cheerleader especially immediately after eliminating. When your puppy goes, reward instantly with verbal praise, treats, toys, touch and love. 

  1. Learn body language Read your puppy’s body language as most puppies will give cues that they need to relieve themselves. They may start whining, circling, or sniffing. Some may sit by the door patiently; these dogs can be trained to ring a bell when they need to go outside. Others may wander off to find a place in the house to eliminate. If your puppy wanders often, use a light leash in your home when out of the crate to keep a closer eye on your puppy and to catch them before they go.


Potty Training No-No’s

Accidents always happen! Never punish for accidents. No spray bottles, rubbing noses into the soiled area, yelling, or hitting. Puppies do not understand the negative connection and punishment will only create fear and anxiety as well as lead to the deterioration of  your human-animal bond. When a puppy has an accident, it usually is our fault. For instance, we left the puppy in the crate too long, we didn’t adhere to the schedule and routine, or we did not use the proper command. 


Puppy Pads

Puppy pads are not a substitute for a crate. They do not create a safe space and are not a den. Most dogs do not need pee pads as it only leads to confusion for them. However, there are special circumstances that these pads can be used successfully. For instance, puppies living in a high rise, dogs with social anxiety, or our geriatric canines. If puppy pads are needed, make a room for the puppy. Place the pee pad next to the crate, so they realize that there is a special place for elimination.


At AskVet, we know that every pet has its own personality and unique set of needs, which will continually evolve over time. We’re here to help you evolve with them. We use 360° Wellness Plans to help guide you through every stage of your pet’s life—and we’re with you every step of the way.


Join AskVet Today


Give your pet the personlaized care. Get the app!

Building a First Aid Kit for your Pets

puppy first aid

Welcome to the AskVet Webinar Series where our doctors and veterinary professionals present relevant information and discuss important pet topics. Join our live streams to learn how you, your dogs, and your cats can live your best lives! 


While we think of packing an emergency kit for ourselves, we often forget about our pets! In the event of a natural disaster, a home evacuation, a camping trip, or even a quick trip to the park, it is always best to be prepared. In this webinar, Dr. Emily Gaugh discusses how to pack an emergency kit for your pets and how to perform basic first aid care for our furry companions. Watch below to learn more about building first aid kits for your pets!

Customized Kits

First aid kits should be individualized and customized to your pets. Ideally, you want one kit for every pet in your home. Include the following:

  • Emergency info sheet with the contact info of your regular veterinarian, your local veterinary emergency hospital, and Pet Poison Helpline or ASPCA Pet Poison Control hotline phone number. 
  • Include your pet’s normal vitals (heart rate and respiratory rate) and weight.
  • A medication listing any prescription or OTC medications your pet is taking. Also talk with your veterinarian about what OTC medications are safe to use and have on hand in the event of an emergency. Your vet can provide info on OTC antacid or antihistamine dosing for instance.
  • Have recent photos of your pets in case they are lost. 

Basic Assessment

A basic pet health assessment includes temperature, respiratory rate, and heart rate. Having a watch with a second hand or a phone with a timer, will be needed. It is important to know what your pet’s normal vitals are, in order to determine when they are abnormal.

To obtain an accurate temperature, you will need a rectal thermometer, gloves and lubrication. Only take a rectal temperature if you can do so safely. Even the best dogs and cats aren’t always cooperative. Alternatively, an armpit or axillary temperature can be taken. Add 1.5 – 2.0 degrees to the reading for accuracy. Normal temperature ranges from 100-103 F. However, if your pet is stressed or anxious, the temperature can be falsely elevated. If your pet has just woken up or needs to have a bowel movement, the temperature may be falsely low.

Respiratory rates (how many breaths are taken in 60 seconds) should be obtained when the pet is awake. During sleep, they can experience rapid or slow breathing, twitching, snorting, and other normal behaviors that will make it difficult to get an accurate respiratory rate. Make sure your pet is relaxed and not panting. To obtain a heart rate (how many times the heart beats in 60 seconds), place your hand on the chest behind the point of the elbow, or inside the thigh on the femoral artery. 

Kit Contents 

In addition to the contact info, photos, and medications list, you will want to include a cone or ecollar that is already fitted to your pet. Place the cone on to prevent licking or chewing which will reduce inflammation and decrease the risk of infection. Ideally the hard plastic ones are best. Inflatable donuts to wear around the neck are an option as well, but they do not prevent the pet from reaching extremities. Include an old t-shirt to cover a wound or injury and a large towel. The towel can be used to provide pressure if bleeding, and can be rolled and wrapped around the neck to keep your pet from biting in the event that they are in pain. Consider packing a muzzle. Basket muzzles allow your pet to breath, pant, and drink while offering protection.  Roll gauze can be fastened into a temporary makeshift muzzle if needed. Include a slip leash for handling and a carrier for small pets. Your first aid supplies can be stored in the carrier as well. Some miscellaneous items to include are canned pumpkin. This is a fiber source that can help alleviate diarrhea, Pack Karo syrup in the event of low blood sugar, tweezers for tick or thorn extractions, and a 3 days supply of food and water.

Basic First Aid Care

Reverse sneezing, although scary, is often not an emergency, but a reflex due to irritation in the back of the throat. This can be temporarily resolved by getting your pet to swallow. Offer food or water. 


For superficial wounds, mild soap like Dawn dish soap, and water is all you need.Wash gently with clean cloth or rags. If a deeper wound or puncture is present, especially on the chest or abdomen, do not wash or flush as we do not know how deep these wounds go. 


If there is an eye problem, you can flush with OTC eye rinse. If the problem is not remedied after flushing, the eye is red, held shut, or hazy, more extensive vet care is needed. 

Some mild ear issues can be alleviated with ear cleansing. Use a canine specific ear cleaner. Ask your vet what product they recommend.  If you see redness, debris, or your pet is painful, they will need more care than just cleansing alone. 

Peroxide, although helpful for use in de-skunking baths, is a skin irritant. Do not apply to wounds. Also, peroxide is a gastric irritant and can cause vomiting when ingested. Never do this unless instructed by a veterinary professional as this could lead to esophageal burns, esophageal obstruction or gastric ulceration. Never use in cats!


Epsom salts can be used for mild inflammation especially for paws. You can soak a cloth in epsom salts and wrap around the affected area. 

Ice packs and warm compresses  can be used for pain control and to reduce inflammation. Always place a dry towel in between the skin and compress. Do not force your pet to accept heat or cold therapy as we could be causing more harm. Allow them to move away if they chose.


Rest is best for injury. Do not use OTC pain medication for your pets. They are unsafe and could be toxic. Also do not use aspirin. It is not effective at reducing pain and inflammation, it causes stomach ulceration, and prevents vets from using effective meds. 

In the event of bleeding, use non-stick, non adherent telfa pads. Apply pressure with a towel on top of the pad. Do not bandage as there are often complications if not applied correctly, such as more pain, inflammation, and increases the chance of infection. Include nail trimmers and styptic powder, flour, or cornstarch in the event of a broken nail. 


Itching can be alleviated by applying a cool compress and wiping feet with cool damp washcloth after being outside. Include in your kit itch spray and calming shampoo. Your vet may have recommendations on what products to use. 

Heatstroke occurs commonly in spring and summer months. Dogs will become weak, may vomit or collapse. Keep pets in cool shaded areas. Check the temp if you are concerned. Do not delay care in this situation, have them seen right away! If this is not possible, place cool water on the body, but remove right away and repeat.  Spray alcohol on paw pads as well to remove heat from body

If your pet ingests a toxin, try your best to estimate when it happened, how much was ingested, and what the ingredients were. Poison control or your vet will be better able to help you and your pet with the more info you can provide. 


At AskVet, we know that every pet has its own personality and unique set of needs, which will continually evolve over time. We’re here to help you evolve with them. We use 360° Wellness Plans to help guide you through every stage of your pet’s life—and we’re with you every step of the way.


Join AskVet Today


Give your pet the personlaized care. Get the app!

The Settle Mat: What’s That?

Dog laying on settle mat

Welcome to the AskVet Webinar Series where our doctors and veterinary professionals present relevant information and discuss important pet topics. Join our live streams to learn how you, your dogs, and your cats can live your best lives! 


In this discussion with Dr. Marks, we talk about the use of a settle mat as a training tool. A settle mat creates a safe space for your dog to relax, as well as reduces anxiety and fear. Watch below to learn more about this training technique.

A settle mat is a specified mat that your dog can go to and relax. It is not a dog bed, but a mat where they are trained to go for peace and serenity. It allows you as the pet parent to have more control of your dog’s behavior during the day.


Settle mats are a training tool for dogs that are too excitable, or have separation anxiety. 

Pets that are reactive towards people or other pets or dogs that have OCD behaviors (patterned actions with no results, like tail spinning) can benefit from use of a settle mat as well. 


What You Need to Start: 

  • Mat (any type such as yoga, bath, front door mat)- This is your training tool. 
  • Clicker- Clicker training creates sounds that trigger your dog to understand good behavior.
  • Treats- Have a variety of types that your dog loves.

Steps to Settle Mat Training

  1. Place the mat down and wait quietly. This takes time and patience. Refer to clickertraining.com for assistance. 
  2. Praise/click and give a treat when your dog steps on the mat. This requires perfect timing. As soon as your dog steps on the mat, praise and click. Repeat 10 times to establish a good habit. Start placing treats directly on the mat. When your pet steps on the mat to get the treat, click and praise at the same time.
  3. Toss treats away from the mat and move the mat to a new location. You need your dog off the mat to continue training. For this next step, your pet must have all 4 paws on the mat this time for treats. Use commands and praise that are succinct, three word phrases, such as “Good job Samantha” or “Good boy Max!” Praise phrases need to be consistent and short so as not to cause confusion for your dog. 
  4. Repetition is key. Continue to move the mat to new locations. Do not leave the mat out all the time. It is a tool to reduce excitement, not a place for a nap. Next your dog needs to sit or lay down on the mat for treats. You may need to give more enticing treats for encouragement. Again, repeat this 10 times to establish a good habit. 
  5. Build up treat intervals. We do not want to condition our dogs for treats only. Using treat intervals solves this issue. Feed 10 treats, but pause briefly in between treats. Wait a moment, then give another treat and repeat. Build up intervals to a 15 second pause and work them up to extended periods of time on the settle mat. 
  6. Add a Cue. Cue them to go to the settle mat. For example say, “Samantha settle” or  “Go to bed,” or simply say “Mat.” Right before, or as you put the mat down, add the cue.  The goal for your dog is to reach 2 minutes and 30 seconds on the mat.
  7. Add distance. Most of the time during training, we are in close proximity to the mat. Take 1 step back then praise and give a treat if your dog remains on the mat. Continue. If your dog is going to be on the mat for a long period of time, choose a toy to be chewed on and that occupies your pup for a while (like a frozen kong, or rope toy). 

Tips for Success

  • Always end a session. Give your dog a cue that the session is over. Roll up mat and put away. Do not allow use of the mat until training session. 
  • Never use a mat as a place of punishment. It needs to always be a positive safe space.
  • Do not interrupt if your dog is settled on the mat. Let them be. 
  • Keep sessions short. A session lasting 30 seconds to 2 minutes of training per day is enough. Training sessions should be short and focused.
  • Use pheromones. Pheromones are natural chemical compounds that dogs emit normally. Adaptil is a helpful product for settle mat training. Spray on the mat, 8 pumps per session. This creates a warm and relaxing feeling for your dog. 


At AskVet, we know that every pet has its own personality and unique set of needs, which will continually evolve over time. We’re here to help you evolve with them. We use 360° Wellness Plans to help guide you through every stage of your pet’s life—and we’re with you every step of the way.


Join AskVet Today


Give your pet the personlaized care. Get the app!